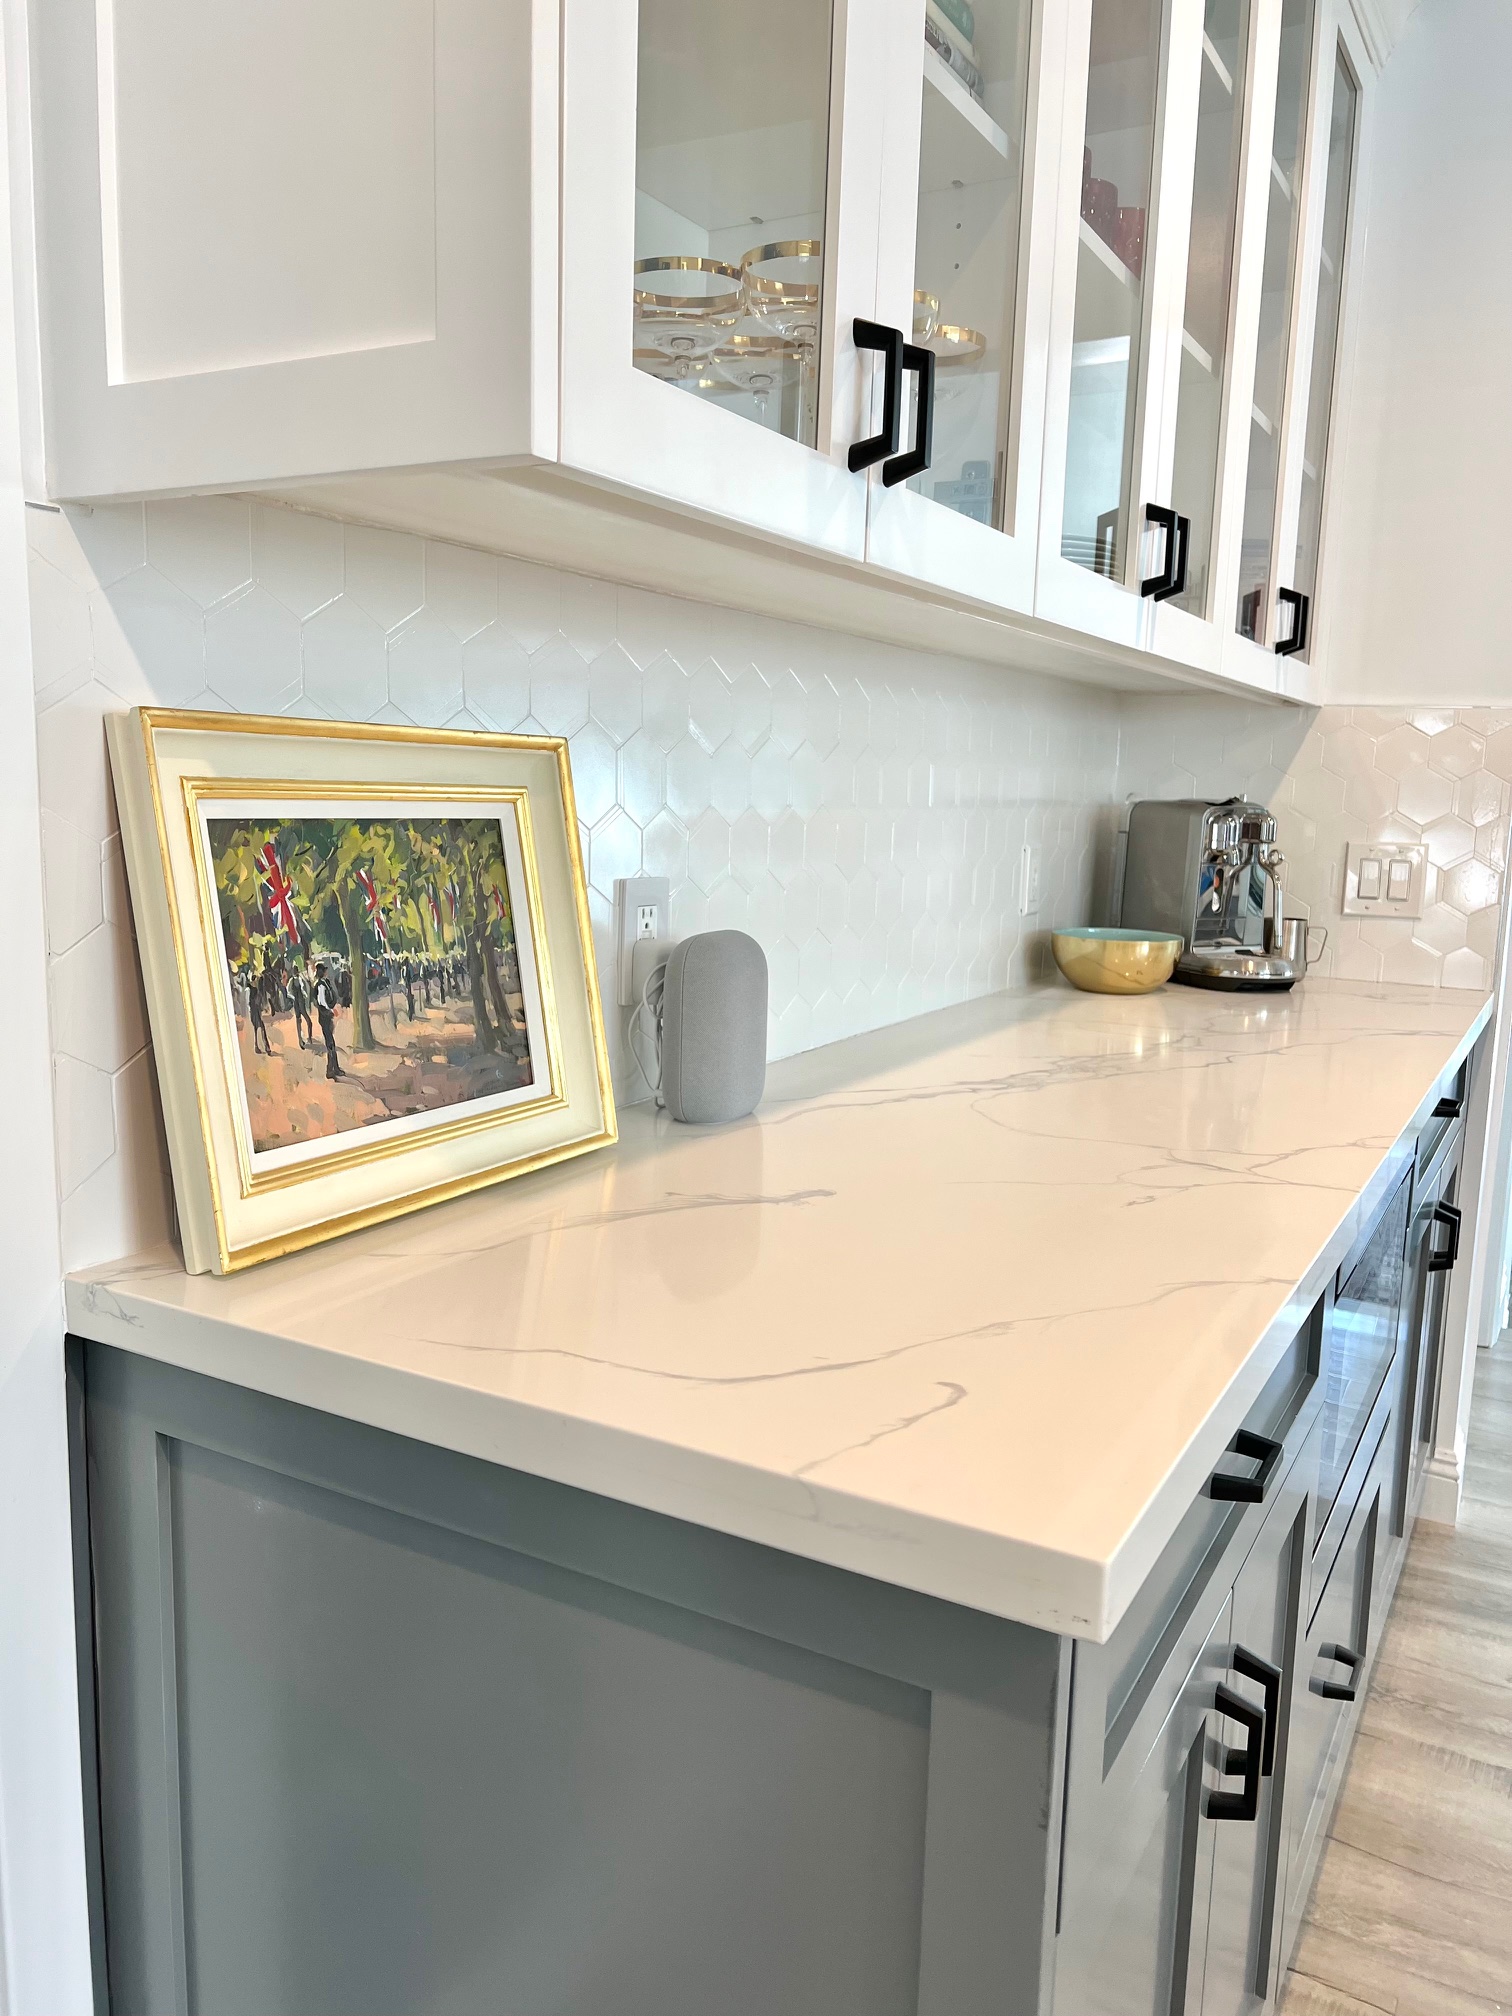
Welcome back to my kitchen refresh journey! In Part 2 of my makeover saga, I’m diving into the controversial world of tile painting. Now, I know what you’re thinking: “Tile? Painted tile? Isn’t that risky?” You’re not wrong—it definitely raised some eyebrows—but hear me out. I was determined to refresh my kitchen without the stress and expense of tearing out the existing tile. So, painting it was!
Why I Didn’t Want to Demo My Tiles
Let’s be honest: Kitchen renovations can get out of hand very fast, especially when you start ripping out things like tile. I wanted a kitchen refresh, NOT a complete overhaul. Removing and replacing tile would’ve meant demolition, dust, time, and a hefty price tag—not to mention a huge mess. So, I decided to embrace my inner DIY king and painted my tiles instead. It’s a more affordable and less invasive option, and it’s also a great way to try something new!
Research, Research, Research
Before I jumped into the painting process, I spent A LOT of time researching how to do this right. I wasn’t about to slap some paint on my tile and call it a day—I wanted smooth, shiny, professional looking results. So I scoured social media and watched countless YouTube tutorials to get a feel for the best methods. Everyone had their own take, but ultimately, I needed a solution that would give me that sleek, glossy finish I was after. After all, a kitchen refresh without a little shine is like a coffee without caffeine—what’s the point?
The First Test: Not Quite There
Before diving into the full kitchen, I decided to test the waters by painting a small section of tile in an area that wasn’t immediately visible. I thought, “What could go wrong?” The result was fine—fine in the sense that the paint went on, but the finish was not quite what I had in mind. It was certainly decent, but I was looking for something ultra-smooth and with a high gloss shine that would make the space feel new. The paint and method I used were supposed to give me that shiny look, but it just didn’t deliver to the standard I wanted. And I wanted perfection 🙂
Enter: Rustoleum High Gloss Spray Paint
After some frustration, I reached out for advice and was directed to a product that would change everything: Rust-Oleum High Gloss Spray Paint & Primer for Multi-Surfaces. This was a game changer! Not only is it durable, but it’s also designed to give a sleek, glossy finish on surfaces like tile. The idea of using spray paint on tile might sound a bit crazy to some (and trust me, I got my fair share of raised eyebrows), but sometimes you just have to trust the process.
Prep Work: The Unsung Hero
If you’ve ever done a DIY project, you know that prep work is half the battle. For this step, I spent a seriously long time masking everything in my kitchen—walls, countertops, cabinets, you name it—using paper and tarps to shield them from any overspray. It was a tedious process, but it’s honestly the most important part. A clean, protected space is the key to a flawless result. Sure, the actual painting went pretty quickly, but the prep? That took a few hours.
The Spray Paint Process: Methodical & Smooth
Now for the fun part: the spray painting. I was methodical about this process. No hasty sprays or heavy coats here. Instead, I used a light, airbrushed technique to build up thin layers of paint, making sure each coat was smooth and even. The goal was to avoid clumps or drips that would mess up the finish. Slow and steady won the race, and the result was worth every second.
The Final Result: Glossy, Smooth Perfection
Once the paint had dried, I stepped back and took in the full view—and let me tell you, it was everything. The tiles were now incredibly smooth and shiny, just like I imagined. The high gloss gave them that polished look I’d been craving, and the fresh white made the space feel so much brighter and airier. It was exactly the transformation I was hoping for.
The Long-Term Results: Worth the Risk?
Now, I know what you’re probably thinking: “But how’s it holding up? Doesn’t spray paint chip?” It’s been a full year since I applied the high gloss spray paint, and I’m happy to report that the finish is still holding strong. No chipping, no peeling—just a smooth, glossy surface that cleans easily with regular household cleaners. I was worried that time might reveal some flaws, but I’m pleased to say that the tiles are as strong as they are beautiful. The spray paint has proven to be a durable, low-maintenance option, and I couldn’t be happier with the results.
A Brighter, Airier Kitchen
One of the best parts about painting the tiles white is how much it has brightened up the space. The kitchen now feels open and airy—like it’s been transformed with just a coat of paint. I didn’t have to spend thousands on a full remodel to get the sleek, updated look I wanted. Sometimes, all you need is a little paint and a lot of patience.
What’s Next?
What’s on the horizon for my kitchen refresh? The next phase of this project is painting my cabinets—another big step toward creating the bright, modern kitchen I’ve been dreaming of. Stay tuned for more updates as I continue to tackle this space one DIY at a time.
Final Thoughts: Yes, painting my tiles was a bit of a controversial move, but I’m so glad I went for it. Not only did it save me money, but it also gave me the kitchen update I was looking for. If you’re considering painting your tiles, take it from me: it’s definitely possible to get a smooth, glossy finish if you put in the work—and it’s so worth it in the end.
Let me know in the comments: Would you try painting your tiles? Or do you think I’m crazy? 😜
Items Used For This Phase:
Rust-Oleum High Gloss White Spray
Painter’s Tape
Plastic Drop Cloths 9×12
Plastic Gloves
Spray Paint Mask


Leave a Reply